And my unoriginal Thread titles continue. ")
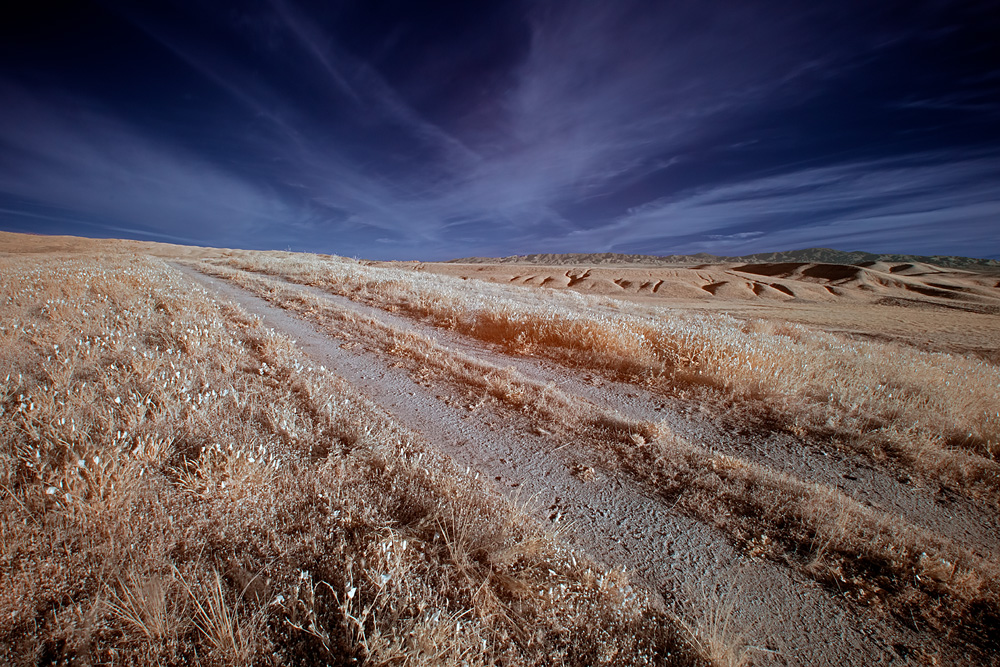
So taking @Amy Nelson list of instructions posted in my 1st Time with IR thread, I took one of the other photos I had shot at the Antelope Valley Poppy Preserve area. I only took about a dozen shots maybe just to play around and get some test images to work on. So after wrapping up sunrise, I switched my attention to IR.
A couple of things to note. My camera, the Nikon D850 is stock, it's not converted to IR or anything. I simply had bought a 720nm IR filter (77mm) that I can screw onto one of my lenses, in this case it was the 16-35mm Nikon I believe. Now using these filters, they are as thick as a 10 stop ND at least. maybe a 20 stop. So my 1/200th of a sec exposures without the filter turned to 30 sec exposures with it on. So, a tripod was necessary.
I rarely use the Live View on my camera, I just use the optical viewfinder. But with the IR, since I can simulate exposure on the Live View, I found myself glad that I had it.
So the processing this time followed Amy's steps, which basically involve a better White Balance, using a Color Profile setup for my camera with the 720nm Filter on it. Doing the Channel swap through the Channel Mixer, and some slight tweaks to the color to taste. That's really it. Once I had gotten the Color Profile set up for the camera, the rest of the process went super fast.
So, @beavens @Amy Nelson @Jim Peterson and anyone else, please let me know how this one turned out. For me it turned out almost exactly like I had hoped.
Jim
So taking @Amy Nelson list of instructions posted in my 1st Time with IR thread, I took one of the other photos I had shot at the Antelope Valley Poppy Preserve area. I only took about a dozen shots maybe just to play around and get some test images to work on. So after wrapping up sunrise, I switched my attention to IR.
A couple of things to note. My camera, the Nikon D850 is stock, it's not converted to IR or anything. I simply had bought a 720nm IR filter (77mm) that I can screw onto one of my lenses, in this case it was the 16-35mm Nikon I believe. Now using these filters, they are as thick as a 10 stop ND at least. maybe a 20 stop.
So my 1/200th of a sec exposures without the filter turned to 30 sec exposures with it on. So, a tripod was necessary.I rarely use the Live View on my camera, I just use the optical viewfinder. But with the IR, since I can simulate exposure on the Live View, I found myself glad that I had it.
So the processing this time followed Amy's steps, which basically involve a better White Balance, using a Color Profile setup for my camera with the 720nm Filter on it. Doing the Channel swap through the Channel Mixer, and some slight tweaks to the color to taste. That's really it. Once I had gotten the Color Profile set up for the camera, the rest of the process went super fast.
So, @beavens @Amy Nelson @Jim Peterson and anyone else, please let me know how this one turned out. For me it turned out almost exactly like I had hoped.
Jim