One of the things I struggled with is to get the right RAW setting in ACR (I don't use Lightroom, I know ...). The reason being the channel swapping is done in Photoshop. So often I'd go back to ACR and tweak the white balance get back to PS. Rinse and repeat. Over time one gets a feel for it and the # of iterations come down significantly. But what if we can do the channel swap in ACR itself? I finally found a way to do it. This may not be news to many of you long term IR gurus, but hopefully this will help newbies like me.
There are two approaches to this. One is to use LUTs (Lookup tables). I'll go over the other one. This may sound convoluted, but it is pretty straight forward. And this can be saved as a preset and loaded for one or more files.
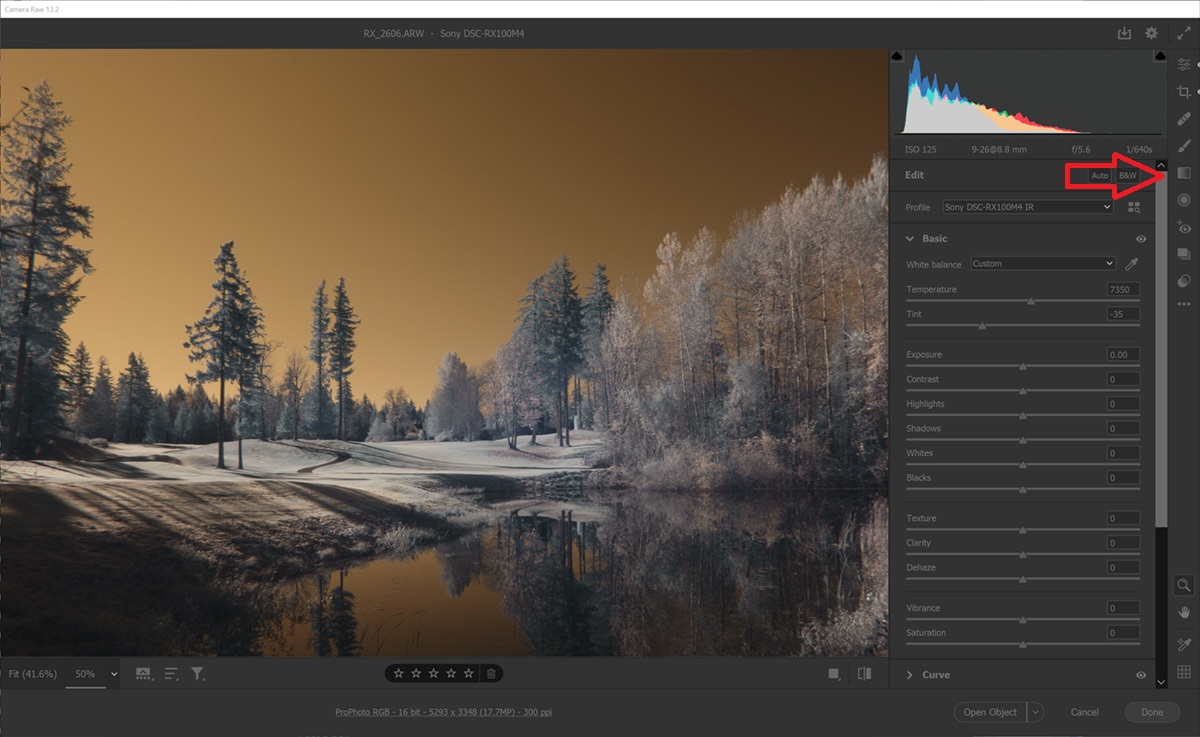
After loading the RAW file in ACR and applying the IR profile, click on the Graduated Filter icon (5th from the top in the latest CC).
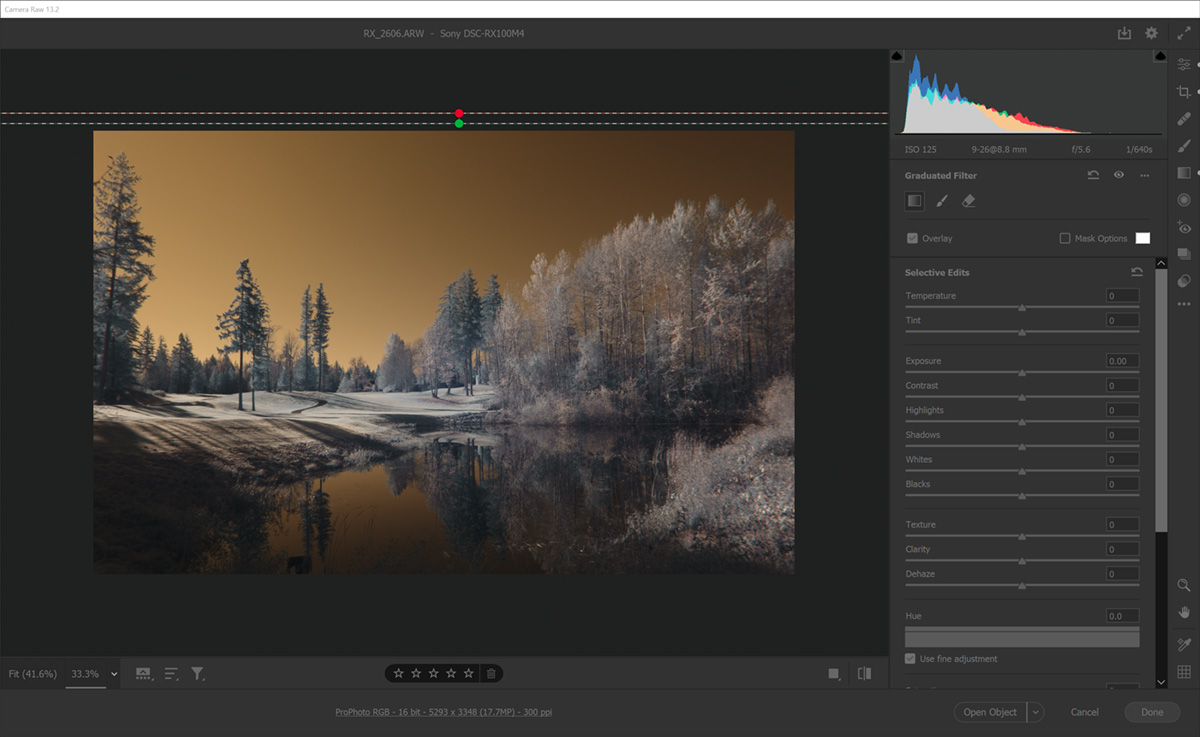
Now click on an area outside of the image, hold the shift key and drag out.
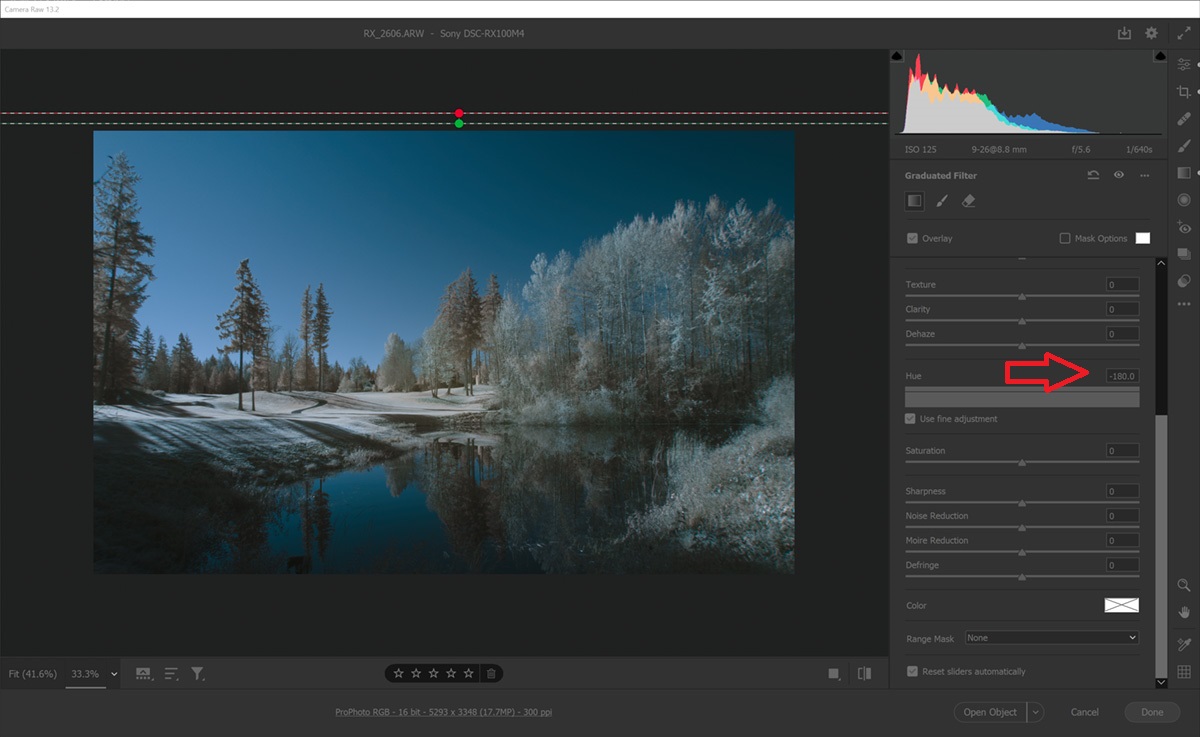
Now go to the hue adjustment and drag the source all the way to the left, or just enter -180.
Now if you want to save this as a preset, make sure to select Local Adjustment->Graduated Filters and any other thing that you would like to automatically apply.
Enjoy
There are two approaches to this. One is to use LUTs (Lookup tables). I'll go over the other one. This may sound convoluted, but it is pretty straight forward. And this can be saved as a preset and loaded for one or more files.
After loading the RAW file in ACR and applying the IR profile, click on the Graduated Filter icon (5th from the top in the latest CC).
Now click on an area outside of the image, hold the shift key and drag out.
Now go to the hue adjustment and drag the source all the way to the left, or just enter -180.
Now if you want to save this as a preset, make sure to select Local Adjustment->Graduated Filters and any other thing that you would like to automatically apply.
Enjoy