Hey Ed,
Alan has given you some good tips.
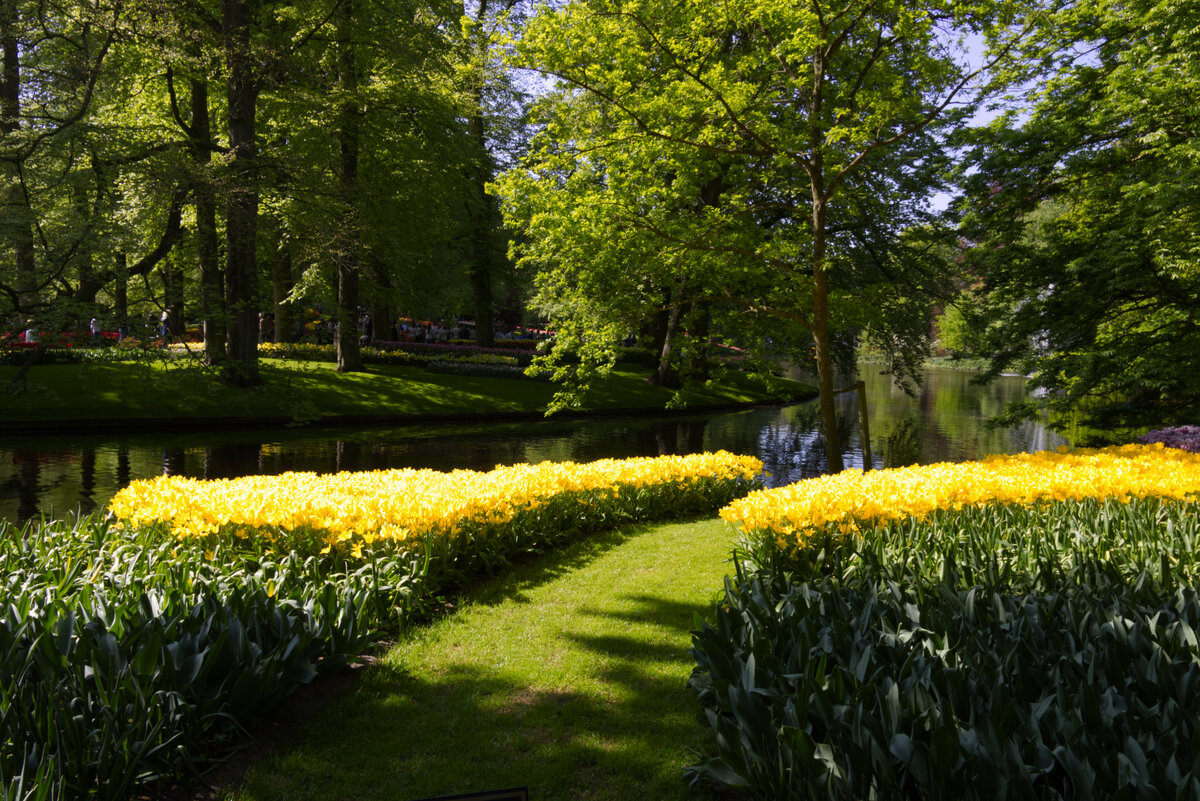
I still haven't used Linear profiles, so I am stuck doing images like this the old fashioned way. So sometimes you have to double process the raw image when it's like this. You focus on the highlights first.
So in ACR I would pull down on the highlights until the point that the blown out yellow flowers look good. If at 100% highlight recovery, they are still blown, then slide the exposure slider down to a max of -1. You get the highlights to look the best you can.
After that you go to the Shadow Recovery, and you adjust that to recover as much shadow detail as possible.
Note, the key with both the highlight and shadow recovery sliders is to stop once things stop looking natural. Usually that means the colors start turning gray, or it gets a weird tone to the image. If you get that, you know to back off.
Then in ACR choose Image Enhancement to reduce the noise that will come into an image from pushing it so much.
Then save it as a tiff.
Now load the tiff, and repeat the previous steps. If you did get the highlights looking good the first time, then leave those and just focus on the shadow details.
*** Technically this isn't Double Processing a Raw image. In reality in the old days we would take the Raw image, and process it once for the highlights and then a 2nd time for the shadows. Then with a Luminosity mask we would combine the 2 to stretch the Dynamic Range of a scene. I believe we have an Article describing that in more detail in our Article section.
******* And a too late tip. When shooting landscapes, always do what's called Expose to the Right. (ETTR) That means when you capture images, you make sure your highlights aren't blown, by making sure the histogram is to the Right side without a gap. But you don't want to Clip the highlights, so you have to watch it. Most cameras have (Nikons for sure) what was called Red Blinkies, where any area being blown out would blink red when you reviewed it on the LCD. So you want to watch for that.
If you Clip the Highlights by exposing too much and going beyond the right edge, then the darker areas will look better in an unprocessed image, like on your view finder, but the highlights will have lost detail that you can't retrieve.
In general, most cameras can Under Expose 5 stops and still recover shadow details. And you can overexpose only 1 stop and still recover the highlights. That's why you want to expose towards the highlights but not Clipping the Highlights.
Maybe too much info.