Hey Alan, how about a example of how you would adjust the sky with Topaz Adjust?My favorite tool for skies like these is a filter from Topaz called Topaz Adjust. There is a new version of it that works inside of Topaz Studio called Precision Adjust (if you own the standalone Topaz will give you the new Studio version for free). The slider called Microadjust can tease some amazing details out of clouds. I often use this in conjunction with masking layers for skies like these. The Clarity slider both as a brush tool as well as overall is the closest thing Adobe has to what Topaz is doing although comparing the two is like the difference between stone tools and a surgeons blade.
Along the Gros Ventre River
- Thread starter Ben Egbert
- Start date
Hi Jim, my issue is that the sky is starting to look harsher than I like. I have no problem pushing things a bit.
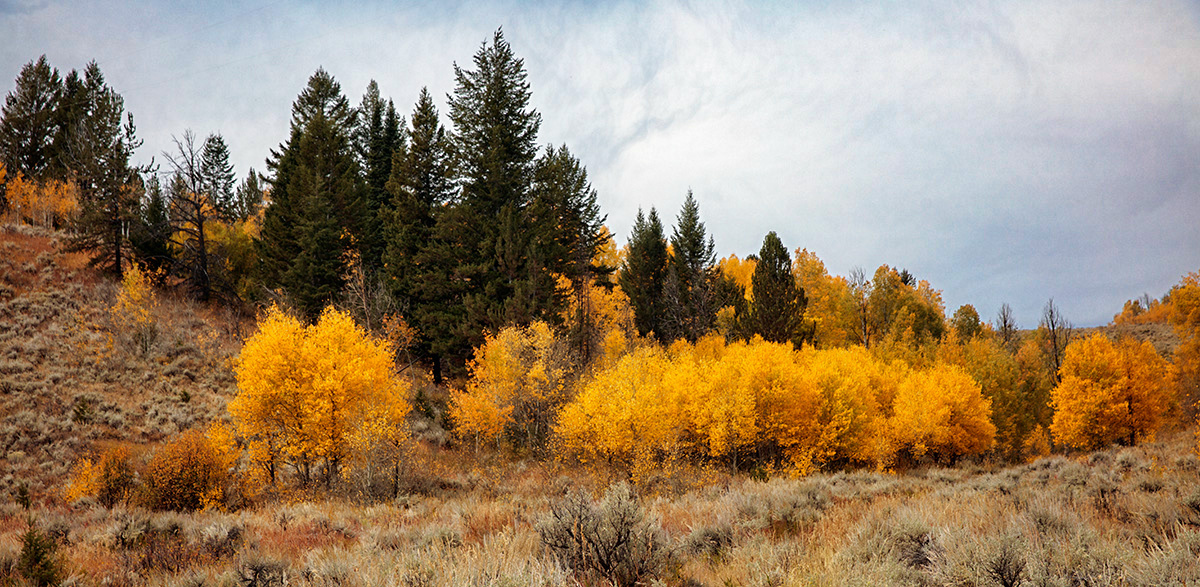
You are correct, when we stopped later, the sky had a lot more drama, here is an example.
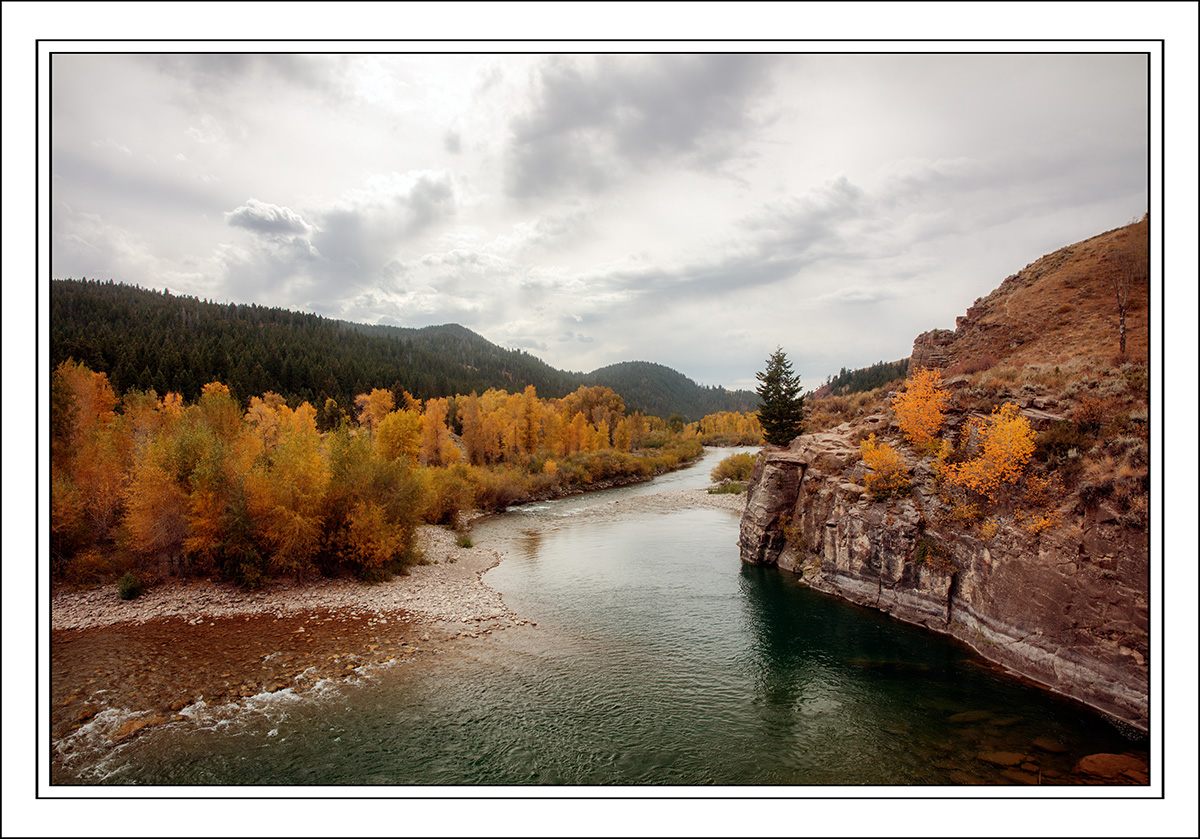
You are correct, when we stopped later, the sky had a lot more drama, here is an example.
Yeah, that's what I thought, thanks for adding that Ben for context.Hi Jim, my issue is that the sky is starting to look harsher than I like. I have no problem pushing things a bit.
You are correct, when we stopped later, the sky had a lot more drama, here is an example.
View attachment 14292
AlanLichty
Moderator
Here is a quickie pass on the original jpeg at the top of the thread. There are limitations on how far you can push it once it's a jpeg file. This was done in Topaz Studio with the Precision Contrast toolHey Alan, how about a example of how you would adjust the sky with Topaz Adjust?
AlanLichty
Moderator
Ben - my bad - the Micro contrast adjustment is in Topaz Clarity (or Precision Contrast in the Studio module). Topaz has been moving a lot of their filters over into the Studio module which can be used as a stand alone app or within LR/PS. I have been experimenting with Studio as a Smart Layer in PS since there are adjustment filters Topaz is making that have no equivalent to the PS filters like Adjust 5. If you own any of the older style filters like Adjust 5 Topaz will give you it's Studio equivalent for free. Studio itself is free.Hi Alan, I used Topaz bold sky's on this image in addition to levels and curves. I need to try Microadjust.
Edit:
I have Topaz adjust 5 and Detail 3. I looked in both places and only find micro adjust in Detail, and there are 2 versions. I also have a way to enhance clouds in Adjust 5.
Here is one with both.
I like this much better Alan. I guess I need to contact Topaz for studio. The way I use Topaz is via an action that creates a layer, opens the filter set I want to use, applies it and then allows me to adjust or blend when back in PS.
Kyle Jones
Moderator
Just for kicks..
First I did a camera raw adjustment on the sky adding 30 dehaze, about 10 clarity, cooled it -5, and adding 10 vibrance. I masked that to adjust just the sky and set the opacity to about 65% (it was a little too strong). Then I used a lights-2 luminosity mask and did my hard s-curve to bring out more. Layer stack and curve shown below...
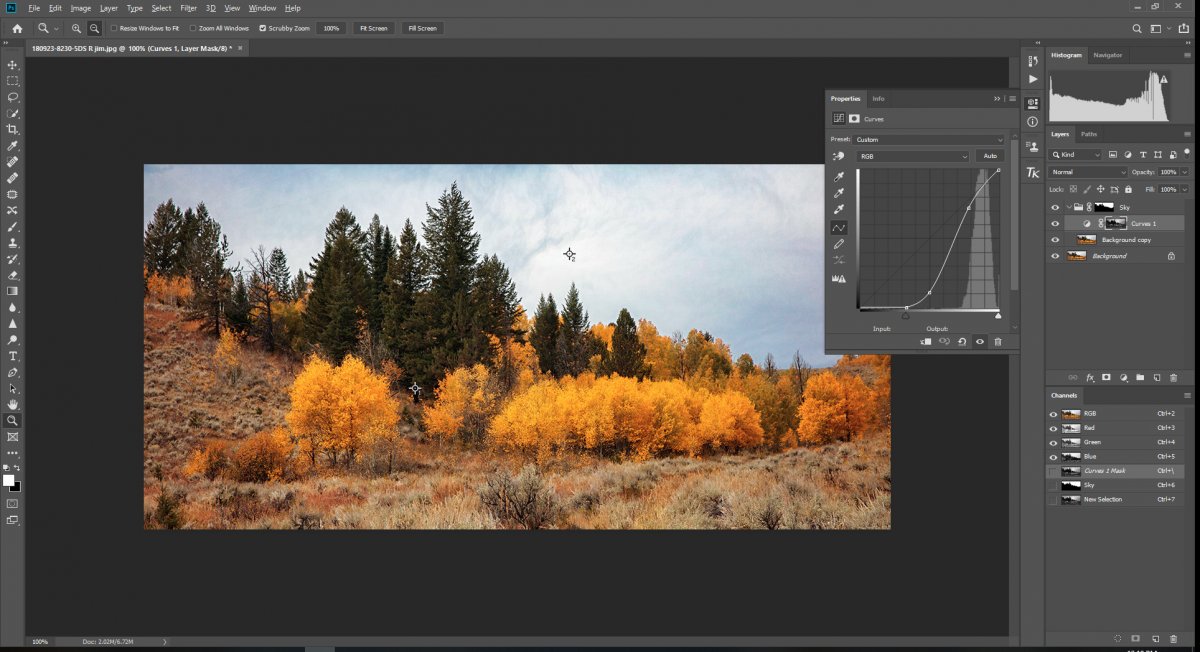
First I did a camera raw adjustment on the sky adding 30 dehaze, about 10 clarity, cooled it -5, and adding 10 vibrance. I masked that to adjust just the sky and set the opacity to about 65% (it was a little too strong). Then I used a lights-2 luminosity mask and did my hard s-curve to bring out more. Layer stack and curve shown below...
Ok Kyle, I tried it and here is the result. The raw filter part was easy as was the curve layer, but I am not sure what you meant by Luminosity mask. I just did a normal mask of teh sky after applying the raw filter work and applied a curve and changed the mode to luminosity.
Anyway, the histygram before applying a curve was broader than yours. Which jpg did you start with?
Last edited:
Kyle Jones
Moderator
The histogram was broader because I only selected the brighter areas - I used a lights-2 TK luminosity mask. Without the TK actions, you can select the same tones by:View attachment 14296 Thanks Kyle, that's looking good and thanks for the screen shots. I am going to try this fomula.
Ok Kyle, I tried it and here is the result. The raw filter part was easy as was the curve layer, but I am not sure what you meant by Luminosity mask. I just did a normal mask of teh sky after applying the raw filter work and applied a curve and changed the mode to luminosity.
Anyway, the histygram before applying a curve was broader than yours. Which jpg did you start with?
1) ctrl-click on the rgb channel in the channel pallet (selects the light tones)
2) ctrl-alt-shift-click on the rgb channel (refines that selection to the "lighter" lights
Either way you definitely duplicated my attempt! One downside is that dehaze adds some noise/grain. It would probably make sense to include some noise reduction in the RAW step to counteract it.
Last edited: